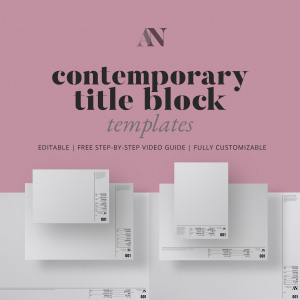
One of the quickest ways to make your drawings more professional and more polished is to make sure they have an excellent AutoCAD title block.
The key is to make sure you give yourself a good template. Now it can take a bit of time, but with a little effort, you can make a custom title block template. (If you don’t have the time, I have some title blocks in my shop to help make it a bit easier!)
Today, we’re going to break how to make your own AutoCAD Title Block template down, step-by-step.
- Choose your method
- Plan it out
- Draw it in AutoCAD
- Start using it in drawings
Step 1: Choose which method you want to use to create your AutoCAD title block.
First, there are primarily two techniques used to create AutoCAD title blocks.
- You can create a .dwg file that will be used as an XREF (external reference) placed on the layouts. OR
- You can create a CAD block that can be inserted on the layouts.
There advantages and disadvantages to each technique, so it will depend on your own circumstances which option you choose.
Title block as an XREF
If you have really big projects that might have hundreds of pages for a particular site and client, you might choose to have a title block as an XREF (external reference). This way you can update your client information just once, and not have to worry about it for the rest of the pages. This means you’ll have a title block template .dwg file, but you’ll have an individual title block .dwg file for each and every project.
For this technique, you’ll need to be very organised with your CAD files. You don’t want your drawings to lose their link with the XREF. You’ll also want to ensure that you have a dynamic block to use within the drawings file itself to add consistent and cohesive drawing information that will be unique to each sheet.
Title block as a block
Now if you have projects that might have more like a dozen or so drawings and you’re only working in a few .dwg files, it might be easier to have your title block set up as its own block. This is how my title blocks are set up. This can make it easy to update information and ensure it’s always within the .dwg file itself where you’re not relying on an external reference.
Step 2: Plan your title block and what you want to include.
Once, you know which technique you’re going to use, go ahead and plan out what you want your title block to include and look like. (You might find this blog post helpful in considering what to include).
- List out all the different fields you want to include in your title block. Think about your own drawing information, project information, etc. that would be helpful.
- Organize your logo or branding files that you want to have included within the title block. Also, make a note of the specific contact information you want to include on your title block.
- Decide on your fonts. Think about what style you want to evoke within your title block. You’ll need to make sure your chosen font is installed and ready to be used. You might need to consider heading fonts, subheading fonts, and body text fonts. (You may find this blog post helpful).
- Decide on any additional graphical elements, like lines and shapes. Think about how you want to divide sections in the title block. Are you wanting it to be very grid-like? Or are your wanting it to be a little bit more minimal?

Step 3: Draw it in AutoCAD.
Now that you have a plan, it’s time to make it in AutoCAD! Below, you’ll find two videos. The first goes through setting up a title block via a block. The second goes through setting up a title block via an XREF. (Refer back to step 1 to decide which video will be most relevant to you!)