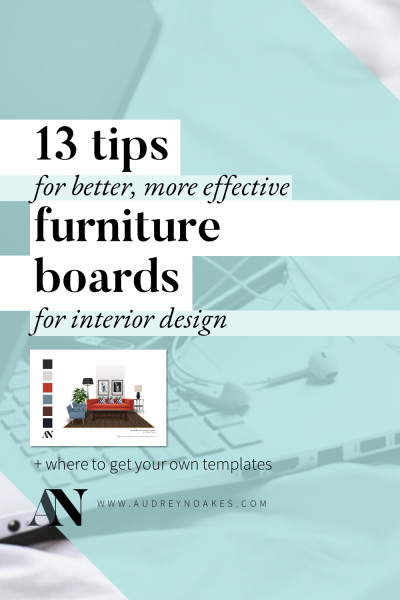
13 Tips for Better, More Effective Furniture Boards for Interior Design
Furniture boards are part of the industry and most clients will expect some sort of illustration of the furnishings you have picked. These digital compositions will likely be what they are most familiar with.
That being said, there’s a big range of the professionalism in how these furniture boards are presented. Some furniture boards look like elementary school projects, if I’m being honest. While some furniture boards, convince me of the designer’s genius and I want to go live in that room. I think we can agree, that we all hopefully aspire to make furniture boards in the latter category.
There are definitely some key tips that have been observed on these great furniture boards. I’ve organised 13 of the most important tips for furniture boards below.
In no particular order:
-
-
- Balance the composition
- Align images
- Keep text minimal
- Don’t crowd images
- Make the composition logical
- Only use perspective correctly
- Layer images intentionally
- Be consistent with image types
- Use quality images
- Consider proportion
- Avoid borders and other extra details
- Don’t forget your own branding
- Label with consistency to other documents
[elementor-template id=”11513″]
1. Balance the composition
You know when you look at a room and it just seems….off? As interior designers, we definitely know to create an intentional balance within a space. Similarly, we need to consider balance in the composition of a document. Look at the two examples below.

Now let’s look at these two compositions just as black and white images.


The image on the left is a bit heavy on the left with a lot of empty space on the right. While asymmetrical balance is certainly possible, there should still be a visual balance in the composition. White space and ‘breathing room’ is good to have but it should be intentional and not an empty accident.
2. Align images
This one is so simple but makes such a difference. Align your images. Having a whole host of ‘edges’ at different points on the board can make for a messier look. Just a few nudges can help make them much more polished. The good news is that a lot of software like Photoshop, InDesign or even PowerPoint will automatically help you align images these days.
Look at these two images.


The differences are subtle but which one looks a bit more polished to you?


On the left, there are a few edges that just are slightly misaligned. On the right, the images are consistent and work together to hold the edge of the composition. This is a small adjustment but one that can make for a much more polished final look.
3. Keep text minimal
Text really should be minimal on a furniture board. You want the visual impact to be your own lovely design, not a bunch of script fonts with colors or distracting phrases.
Let’s look at these two examples below.


The top image is a bit much. The font is difficult to read. The text is in different sizes and different colors. Also the labels are long and there is an extra phrase in there thrown for good measure. The bottom board is a bit cleaner. It’s the same exact composition, but the simple sans serif font in a light weight and non-distracting color works great in labelling the various pieces. Also, the labels are kept at consistent locations relative to the images. This makes the overall composition easier to read and keeps the focus on the actual content of those images.
4. Don’t crowd images
Everyone needs a little bit of breathing room, and crowded images can make a furniture board just look unnecessarily messy. Always double-check your board for pinch points and areas that are just a bit too crowded.

Like in this board, the images are just too big on this composition. Everything feels too close together. If someone looks at this and is being asked to apply these ideas to a room, it might make them think that this is going to be a crowded and busy room. Even if that isn’t at all your intention.
5. Make the composition logical
Logic is an underutilised aspect of thinking when you’re working on a tight deadline. But keeping a logical arrangement in mind as you assemble a furniture board is incredibly important. It can help someone not familiar with your design visualise choices within a space.


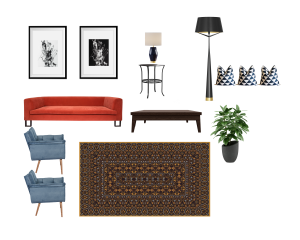
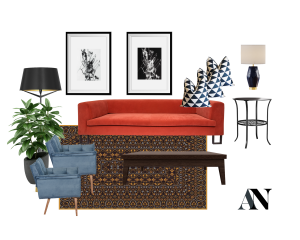
Let’s look at these two images. The one on the right has the rug and coffee table at the top of the page. The art for the wall is at the bottom of the page. If you treat a furniture board as a picture plane of how you’d see a room, this room is upside down. On the left image, instead there is more logic to show the selections working together. The trio of the rug, the sofa, and the art is particularly effective in showing how these 3 elements will work together.
6. Only use perspective correctly
Because the software being used to create furniture boards is getting more and more advanced, you may be tempted to ‘fake’ perspective to create a room like view of your selections. I would caution you to do this only when it works, not when it doesn’t. It doesn’t take long to train your eye to notice the difference. When perspective is used wrong, it will automatically look wrong or look flat. More subtle use of perspective can instead give you a nice composition without being distractingly amateur. (Pet Peeve Alert: Keep in mind that a perspectival furniture board can’t replace a 3D visual rendering, so don’t ask it to.)

Let’s look at this furniture board. It’s not awful. But it’s not great either.

There are some odd angles, the space has some floating elements, and some images just look too big if it was to be a real room.
Alternatively, we could be more intentional:

For this board, the rug is set to a more realistic 1-point perspective. The size of the armchairs has been adjusted to be more appropriate. And things that would be next to each other are showing up in the same ‘plane’ within the ‘perspective’.
7. Layer images intentionally
Layering images can be a great way to show how selections will work together. But make sure you do it with intention and consideration of the overall composition.

For the image on the left, the layering is interesting, but the legs of the sofa just blend with the rug. The plant starts to crowd the armchairs, and the cushions are making a daring escape from the sofa. The image on the right, instead, uses layering minimally. Here the side-by-side chairs are shown together, the coffee table and the rug are shown together, and the cushions and the couch are shown together. This is logical as each of these pairings have logical relationships with each other. It’s not too crowded, and it gives the board some ‘breathing room’ to not look too messy.
8. Be consistent with image types
For furniture boards there are typically two types of images you can use.
- Images with white or transparent backgrounds.
- Images with backgrounds.
Whenever possible, you want to use these image types as consistently as possible. Images with backgrounds have hard edges and will look best in an organised composition with other images with backgrounds. Mixing the two types can make your brain have to work a little bit harder to understand what’s being shown in the furniture board.

This definitely isn’t the worse example I’ve seen, but in the above board, the art, lamp, and cushions are shown within other spaces so they have backgrounds. They’re aligned at the top which is good to see and helps hold that edge, but the background make these images visually a bit heavier than the others, which doesn’t really make sense for their content. Instead, it would have been worth editing these product images to show only the product itself to be consistent with the other images on the board.
9. Use quality images
This one is a bit of a no brainer, but check your images for pixilation. Blurry or rough images just looks unprofessional. Always use high quality images at a good resolution. Zoom in at 100% to check to see what your images look like. You want them crisp and clean.
Below shows just how a few lower quality images can ruin a composition.

10. Consider proportion
This is really a sub-tip of using logic. But it’s so important, I’m making it it’s own thing.
Because you’re making these furniture boards digitally, take the time to resize the images appropriately. Your images should be relatively proportional in that the most dominant item in the room, should likely be the biggest image on the composition.

In this example, the coffee table and the rug are tiny, but the throw cushions are the same size as the couch. Also, the potted plant is taller than the floor lamp. These proportions don’t really align with the design that the selections would make.
11. Avoid borders and other extra details
These can be done well on occasion, but most of the time, borders, shadows, and extra graphical details are just distracting and make the board look messy. For example, see below:

Here, the boarders are different styles, there are shadows, and odd alignments. Altogether, the composition, doesn’t give you a full vision of the design and makes it a bit more about the borders than the images themselves.
12. Don’t forget your own branding

Stand by your work. Don’t forget your logo and any relevant professional details. Make sure they’re polished, of course. Use a black and white or plain version of your logo where the focus is still on the design. Keep any additional text tidily presented and in conjunction with the other text.
13. Label with consistency to other documents
To make sure your furniture boards still exist in the larger collection of client-facing project documents, be consistent. If you’re using numbers and keying items in your furniture board, use those same numbers in the floor plan. This extra attention to detail, not only makes it easy to look at all the documents together, but it can also build your client’s confidence in you as a professional, so it’s worth the effort.
So those are my top 13 tips for furniture boards. Let me know if you think I’ve missed any! Good luck!
[elementor-template id=”11513″]
-