7 Ways: How to remove a background from an image for your interior design presentations
Hey there! This blog post features a few referral or affiliate links. I’ve noted them with * after. These links mean if you decide to buy from this company, I get a small commission. The below post goes through both paid and free means of removing backgrounds. If you’d like to know more about my affiliate disclaimer, click here.
Looking for images with ‘…no background’ or ‘…white background’ search terms is pretty common in interior design. Inevitably, sometimes the perfect image of a piece isn’t so perfect because it has a background that will make it distracting or inconsistent with the presentation it’s going on. This is why having an arsenal of how to remove a background from an image for your interior design presentations is pretty key. In this post, I’ll walk through 7 ways you can remove the background from an image.
1a. Photoshop Object Selection
6. Canva – Background Remover Effects
7. Design Files – Background Removal Tool
In the video below, I walk through all 7 techniques. I’ve added chapter stamps to help you find the technique that will work best for you. There’s also text descriptions and screenshots documenting each technique below.
1. Photoshop (PAID)
By far and a way the most professional means of removing a background from an image is Photoshop in my opinion. There’s a reason it’s the gold standard in image editing. In Photoshop, there are actually 3 ways to remove the background from an image: the object selection tool, the magic wand tool, and the lasso tool. The object selection tool and magic wand tool are the easy but imperfect ways of removing the background while the lasso tool is the hard but most effective way of removing the background.
[elementor-template id=”11503″]
Object Selection Tool
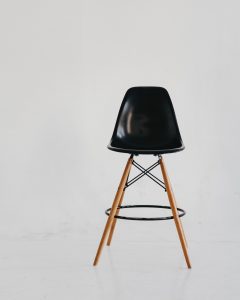
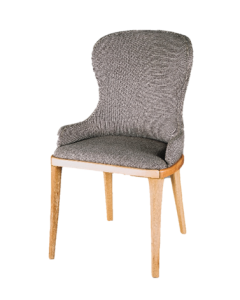
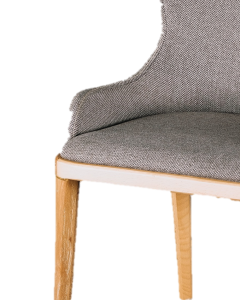
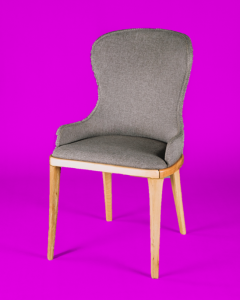
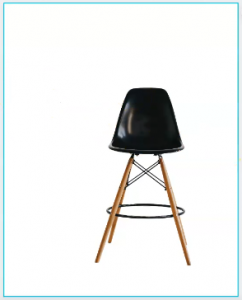
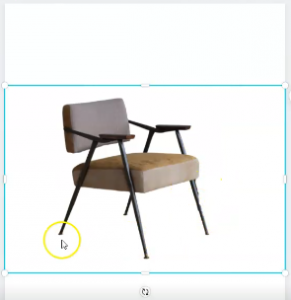
Older versions of Photoshop don’t have this option, but if you’re working with a new edition, this is an option under the Wand tool. Basically, with the object selection tool, you can click and drag a window around the object you want to select from its background and Photoshop will do its best to select the pixels that make up that object. Of course, this technique will work best for images that are relatively high contrast and for objects that are fairly simple and easy to see. The more complex or detailed the image the less effective this technique will be. In these three example images, the only image that worked well to remove the background via the object selection was the simple grey chair with the plain background.
Magic Wand Tool
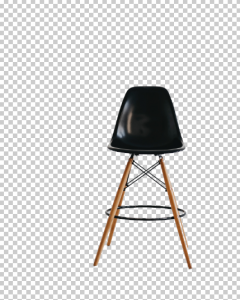
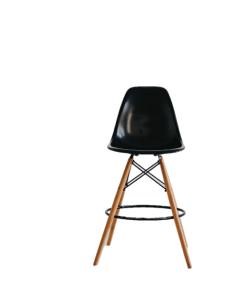
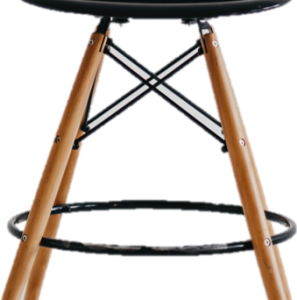
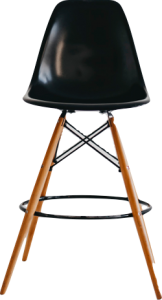
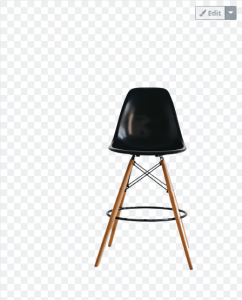
An old reliable tool in Photoshop that seemingly is in constant use is the Magic wand tool. This tool is in the same area of the tool bar as the Object Selection tool, but it gives you a bit more control than the object selection tool. It lets you choose specific areas of the image you want to select or not select. It does require a high contrast between the object and the background to effectively select and remove the background. It also needs a plain background with little difference in colour to make it a quick an easy solution. Of the three example images below, only the black chair on the light grey background worked effectively. The Magic Wand tool let me select those internal areas of the background between the chair legs, and the background was plain and without much detail making it easy for Photoshop to know where the object was compared to the background.

Lasso Tool
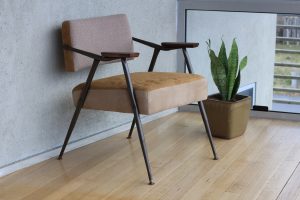
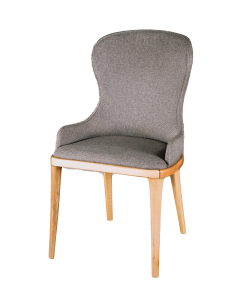
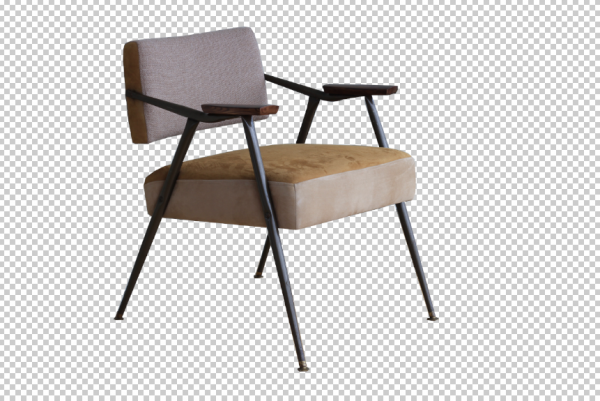
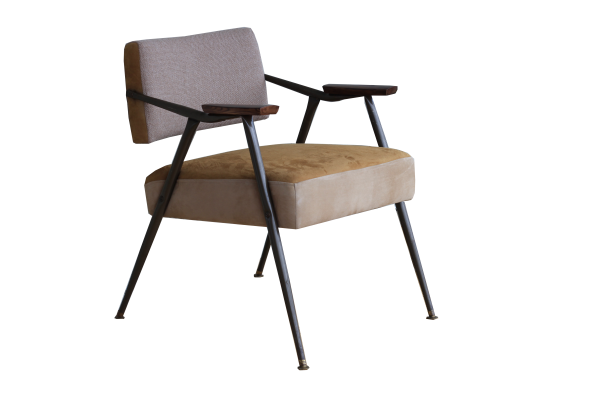
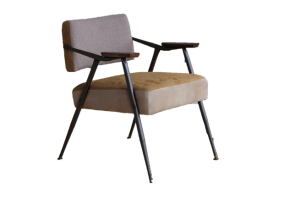
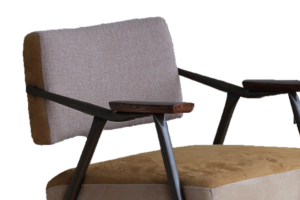
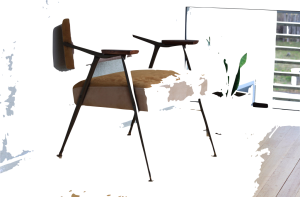
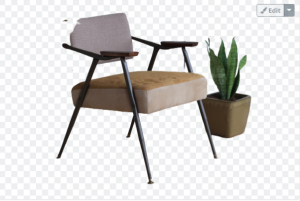
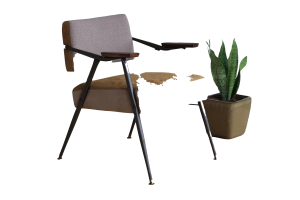
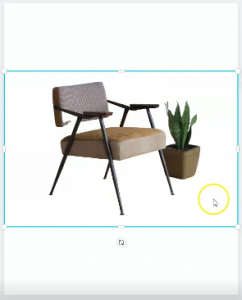
The object selection tool and the magic wand tool are the quick and easy ways of removing a background if they work. But sometimes, they select weird things or don’t select parts of an object and become a bit of a headache. In these cases, it’s better to do it manually. This is when you’ll use the Lasso tool. This technique works best if there is not much contrast in the background or there’s a lot going on in the background of an image. To remove it precisely, you’ll need to use the polygonal or magnetic lasso tool to trace around and object to select it and then remove the background. In our three example images, it was actually the brown chair with the more detailed background that needed this technique the most. It’s an angular chair, so the polygonal lasso tool made for an easy tool to trace the edges and delete the background.

[elementor-template id=”11513″]
2. PowerPoint (PAID – or free trial with many new versions of Windows)
PowerPoint’s image editing has come a long way in recent years. The coloring and image adjustments you can make can be really helpful. And sometimes the remove background button works perfectly. However, for some of these more complex objects or images it can be less than effective. It may also give you a rough edge to the image which won’t look professional in printed presentations or large digital presentations. Let’s look at what the remove background button did for the three example images.
It’s worked on all three images, but if you zoom in there is a bit of fuzziness to their edges. So the effectiveness of the technique will depend on the size of the images in the presentation.
You can see that within the tool’s options in PowerPoint, you can preview where your background will be removed, but there’s a degree of tolerance that allows a bit too much pixilation on these images with curves and detail.
3. Keynote (FREE for Mac users)
I’ll be honest, I prefer working in Windows, because I’m in and out of Autodesk products so much, it just works better for me. That being said, I’ll admit I’m an Apple snob when it comes to phones, so I know there are some people out there who would never use PowerPoint while Keynote is around. The good news is that you can remove backgrounds in Keynote too!
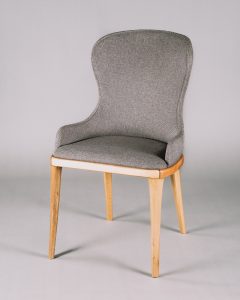
The tool you’ll need to use is Instant Alpha, and it works really similarly to the magic wand tool, in that it lets you choose a color or an area of similar colors and set it as the transparent background. For the example, images, the quickest and most effective result for using the instant alpha tool was the first one. This is because it has a high contrast background, so it was quick for Keynote to recognize what needed to be removed.
It’s a little rough around the edges, but not a bad result for just a few clicks.
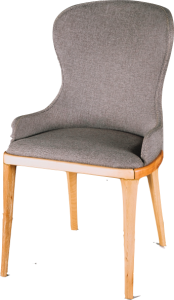
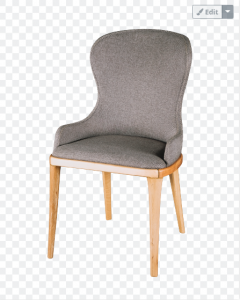
The second example image is not at all well-suited for using the instant alpha tool in Keynote to remove the background. The background has too many similar colors as the object itself, and even if I spent some time on it, it would not give us a clean result.
Although it does start to have that abstract art vibe to it…
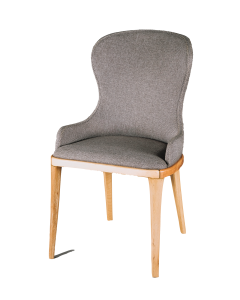
The third example image worked fairly well after a little bit of effort. Because this chair and its background have some really similar colors, Keynote wasn’t able to remove the background with just a few clicks like the first example. Instead, it took several clicks and paying attention to removing the background in individual spots to make it leave the chair alone. That being said, with the extra time spent, the result offers a fairly good image with a removed background.
4. Remove.bg (FREE for 1; PAID for more)
If you’re looking for an online platform that lets you remove the background, remove.bg is designed just for that. It’s only purpose is to remove backgrounds, so it definitely knows what it’s doing. Just like with most automatic background removal tools though, it works best when there is a plain background or a high contrast. So in the first and third example image it worked fairly well.
For the second example image, on the first go, it didn’t quite work as effectively.
However, remove.bg has the ability to easily edit what is removed from the image. So with a ‘paintbrush’ you can go in and restore parts of the image that shouldn’t be removed, and erase parts of the image that need to be removed. Leaving you with a more effective result.

For one-off projects, this is a great tool as it gives a much crisper edge than PowerPoint or Keynote when it comes to these easy to remove background images. However, if you’re needing to remove many backgrounds from images, it’s a paid service, so you’ll want to keep that in mind in terms of how you use it for projects. That being said, it definitely works well.
5. Adobe Photoshop Express online (FREE)
Update! Adobe no longer offers Adobe Photoshop Express online for free. Instead, they offer Adobe Spark for free, online, browser-based photo-editing!
Click here to learn more about Adobe Spark!
The fact that Adobe has given everyone access to Adobe Photoshop Express online for free is just really amazing in my opinion. While not as powerful as a full version of Photoshop, it still gives you a lot of options when it comes to editing images, including removing backgrounds. When you upload your images, it’s as simple as clicking the remove background button on the side. For image with plain or high contrast backgrounds, the removal is crisp and quick. For images where the background is more complex and detailed, it won’t be nearly as effective. This is when that full version of Photoshop would likely be the better fit.

In the three examples, we can see that it worked best on the first one. This is because the background was plain and the object itself was a heavy contrast to the background color. The third image also worked fairly well, but it did leave a bit of the darker shadow behind one of the chair legs. The second image just had too much going on in the background for Photoshop Express to automatically know what was to be kept and what was to be removed.
6. Canva (free but PAID for Background Remover feature)
So Canva* does a lot of amazing things for free, but you’ll need the Pro version to take advantage of the Background Remover feature. In the Pro version though it works great. Similar to some of the other tools, it works well with the plain or high contrast backgrounds. (* Hey this is an affiliate link, which means I get a small commission if you decide to buy the Pro version of Canva, but I recommend Canva no matter what.)

It has a bit more trouble with the busier background of our second example image. The automatic background removal wasn’t super successful.
However, with the erase and restore tools where we can edit these changes, you can still achieve a very good result.
The good thing about Canva’s Background Remover tool is that the result is crisp and clean, unlike some of the other automatic removals on this list. So there is definitely an increase in quality for this paid feature.
7. Design Files (PAID)
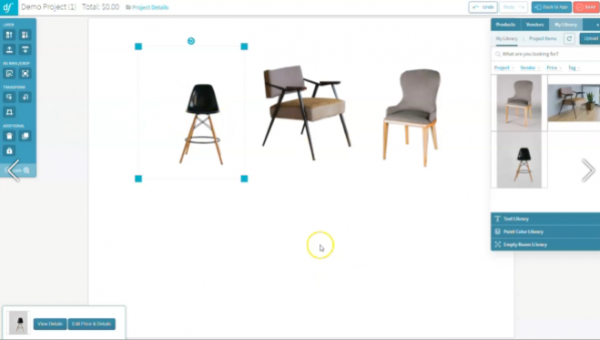
Now I know some of my readers use Design Files* for their boards and presentations. It’s certainly a handy tool in many ways. Among all the organizational tools within the platform, there is also a background removal feature. So win win. (* This is a referral link for Design Files, which means if you decide to join, I get a small commission.)
If you use Design Files, removing the background is pretty easy and effective. They have both an automatic version, which works similar to the object selection tool in Photoshop, and they have a manual version, which works similar to the Polygonal Lasso Tool in Photoshop. The results are crisp and work well within the native board maker within Design Files.