You know I love templates right?
Well, an AutoCAD template is one of the things I especially love. Because a great template can mean your drawings can be done in a fraction of the time they’d take without a template.
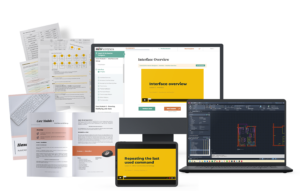
Now, I have a ready-to-go CAD template for interior designers in my template shop. It has loads of the symbols, blocks, layers, and more to make it easy for you to get started quickly with a great template.
That said, I know a lot people want to know how to customize or make a template that works specifically for their work, their projects, their niche, and their workflows.
So to help identify the key points to address in making your own template, I’ve created this 10-point checklist.
Now, I have two caveats for creating an AutoCAD template:
First, a good template takes time. You’ll need to dedicate a great deal of time at least in the beginning to make sure you’re creating a template that’s useful to you and your work. A template that’s made in an afternoon is a great start, but it’s probably not going to achieve the high level of efficiency that’s possible if you dedicate a bit more time in thinking critically and carefully about your template and what you need to work efficiently.
Second, an AutoCAD template does require some more advanced skills. So for someone who’s very much a beginner in AutoCAD, it may be that you need to build your skills up to make the most efficient template.
Now, onto the 10-point checklist:
☑️ Save as a .dwt template file in your program files.
First things first, when you do make a template make sure it gets saved as template file, with the extension .dwt. Then make sure that template file is saved in your AutoCAD program files where it is a template you can choose at the very start of opening the program.
This is easy enough to do. With your .dwg version of the template, just go to the A menu, click Save As then Drawing Template, and automatically, AutoCAD will look to save it where it knows to look for templates.
This means when you go to create a New drawing, your own template will be on the list of possible options.
Helpfully, AutoCAD also remembers the last template you used. So if you’ve opened your customized template once before, now when you click New, it will be the template AutoCAD uses for the next new drawing because it remembers that’s the one you used last time.
☑️ Save layouts.
A lot of template files focus on the model space, but don’t forget about paper space!
Save your typical sheet setups, paper sizes, plot styles, plotter/printer, etc. If these are in the template you won’t have to make them from scratch every time you need to print or plot a drawing.
Now in my AutoCAD title block templates, I’ve set up various page setups with each of the relevant size title blocks already in place. This means if I need a particular size piece of paper with a particular title block style on it, I’ve already got that set up and ready to go.
Yeah, it might not take you that long to set up a layout, but those few seconds or minutes can add up over time, so setting up the layout in your template can be a really asset in working more efficiently.
☑️ Set up layers.
One of the most beneficial aspects of working with a template is that it will already have most of the layers you’ll need. Layers are another thing that don’t take that long to make but most drawings will have dozens of layers. So making sure those settings are all correct to produce the drawing you want can add a lot of time to creating the drawings.
With a good template, you’ll want to make sure a good selection of layers are ready to go with the right colors, line weights, line types, etc.
If you want a starter list of AutoCAD Layers, be sure to check out my cheatsheet in the free resource library.
☑️ Set up text styles.
Text styles!
I think setting up text styles in a template is how you can make your drawings be more individualized and stylized to match your brand and specific approach to drawing.
Now for some projects, your styling may need to align with certain standards. But most of the time, you can be a bit more unique in the styling of your drawings – including the choices of fonts.
Arial is a great choice for simple and technical, but you can also experiment with other fonts to align better with your branding. Montserrat, Josefin Sans, Oswald, and others are some of my favorites!
My suggestion when setting up text styles is to get started with around 3 different sizes. One for small regular text, one a bit larger for titles, and one very large for things like sheet numbers and drawing numbers. Depending on the nature of the drawings, you might need to have some others, but don’t overcomplicate it!
Here’s the text styles I have in my title blocks templates – Title Block – Large, Title Block – Medium, and Title Block – Small. That’s it.
☑️ Set up dimension styles and multileader styles.
Once you have your text styles set up in the template, it will be good to then set up your dimension styles and multileader styles.
These styles will mean your dimensions and notes will look good together. This the opportunity to decide the style of dimensions – tick marks or arrowheads? Offset from drawing for what distance? Etc.
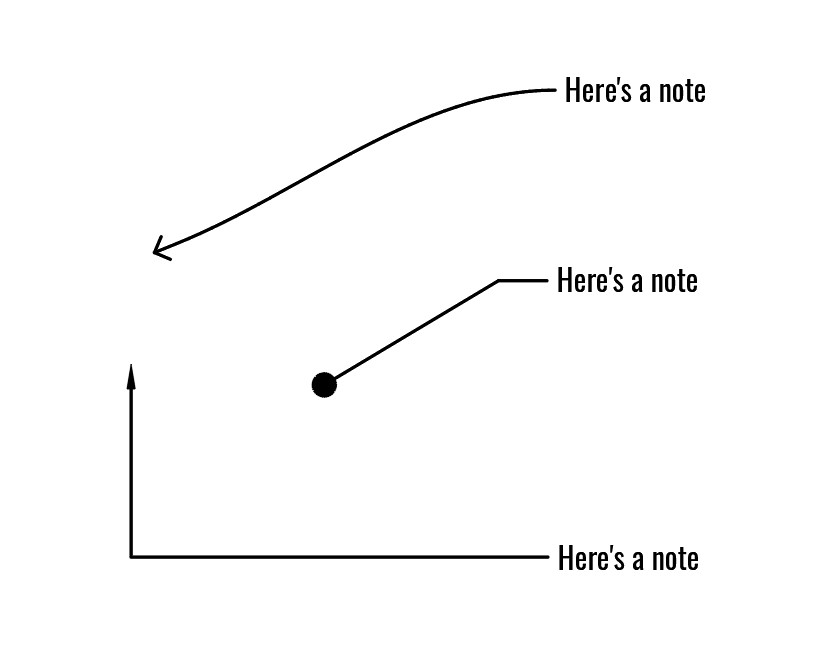
This is the opportunity to decide what style of leader you’ll use for your notes, what style of pointer symbol, etc.
☑️ Set up drawing symbols as dynamic blocks.
Lastly, on the annotations front, you want to make sure you have your drawing symbols set up. This could be drawing titles, section symbols, elevation symbols, etc.
My suggestion here is to make sure these are dynamic blocks!
Dynamic blocks will mean it’s easy to edit text, rotate, mirror/flip, etc. your symbols where they can be adjusted as required for the specific need in the drawing.
Here’s an older Youtube video where I walkthrough how to create dynamic block for a door. These same principles can be applied to symbols.
Imagine being able to flip a section symbol with the click of a button, rotate an elevation symbol with one click, etc. These small time savers will add up and give you an easier way to annotate and label your drawings.
☑️ Set up plot style.
Now this is one of those points that in all honesty you can take or leave.
I’m a big fan of using the default plot style monochrome in AutoCAD, and relying on your layers to manage the plot appearance of your lines. The benefit of using one of these default plot styles is that it means you can open your drawings on any computer and they can still be plotted to look good.
(You can technically copy a plot style along with the .dwg to another machine, but it’s that extra step that can be forgotten that can sometimes be a bit annoying).
The other option is that you can set up your own color-based plot style. This means anywhere this plot style is loaded and installed, the plot style will mean specific colors in your drawing file will print with specific line weights and properties. Now this will take some time to set up, as it’s almost like a template within your template, but when you plan ahead to the various line weights you need and the colors you want to use, it can be set up fairly quickly.
You’ll need to make sure your layers then adopt these colors as required for the plot style to be useful, so don’t forget that step if you’ve set up a color-based plot style!
☑️ Set up blocks.
Of course, a good template becomes a great template when it has a handy collection of blocks ready to use as required in your drawings.
Now there are two ways to think about blocks and templates.
You might want to keep the template file itself clean and clear of too much extra stuff. If that’s the case, you’ll likely want to have a dedicated folder or dedicate support .dwg file where all you’re commonly used blocks are saved and ready to be used alongside the template file.
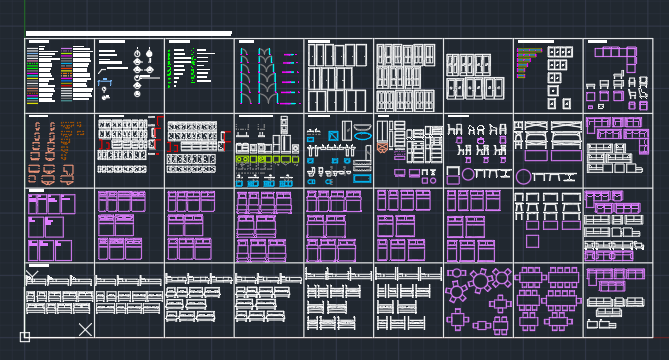
Alternatively, you can load the most commonly used blocks in your practice directly in your template file. This means these blocks are all loaded in the file and can be inserted via the insert tab. You can also organize these blocks in a systematic way within model space where you know exactly where to find the blocks you’ll need when it’s ready.
See below for a screenshot of my CAD template with the commonly used blocks within this grid structure.
The key for this will be knowing what blocks to include.
- What symbols do you use regularly?
- What types of doors or windows are you typically drawing?
- Are there key layouts or furnishings that are often needed?
- What appliances or other equipment do you use a lot?
- Do you have any placeholders that would be beneficial for planning?
As yourself these questions to know exactly what blocks to include your template.
☑️Organize a how-to.
Now this is a checkpoint that is often forgotten, but please don’t forget!
A great template works well for you and your own workflows but it’s also great for when you bring on someone to help. If you bring on new staff or a freelancer and they need to use your template to create drawings, you don’t want to also have to take time out of your day to explain exactly how this template works. Also, keep in mind you could bring on new staff regularly, or assistants or interns might change with the seasons anyway. So the number of times you have to explain this template can quickly increase.
Save yourself the time and make sure everyone is told the same exact thing by having a how-to in place. This could be a more complex PDF with screenshots – I think that will take you a long time!
Or you can quickly screen capture and do the walkthrough that you’d do with someone in-person by just recording your screen and talking over everything they’ll need to know. If you’re on a Mac, you can do this with Quicktime for free; if you’re on a PC, you can use online services like Screencast-o-matic which have very generous free options too. Or if you end up making a lot of screencapture tutorials and how-tos, you can invest in something more substantial like Camtasia or Loom.
No matter what you choose though, having a record of exactly how your template works and how someone can use it will save you hours and hours as you grow.
☑️Regularly audit.
Lastly, you do want to regularly audit your template file.
By audit, I don’t necessarily mean the Audit command in AutoCAD that helps you find problems – although that might be necessary too.
By audit, I mean a close inspection of the template. If you set a date in your calendar to just revisit your template at regular intervals, such as every year, you give yourself the chance to adapt and improve your template based on your work.
With a regular audit:
You could discover that there are a lot of layers you don’t use so should be removed from the template.
You could discover that actually, there’s quite a few door blocks or furniture blocks or symbol blocks that would be beneficial to add to the template.
You could discover that actually, you might be better served by two templates, one for your residential projects and one for your commercial projects because they just operate a bit differently.
By setting up a schedule of when you check and update your template, you ensure you maintain the efficiency it gives you.
Summary
So that’s my 10-point checklist for making a great AutoCAD template. Let me know what you think at audrey@audreynoakes.com.
☑️ Save as a .dwt template file in your program files.
☑️ Save a layouts.
☑️ Set up layers.
☑️ Set up text styles.
☑️ Set up dimension styles and multileader styles.
☑️ Set up drawing symbols as dynamic blocks.
☑️ Set up plot style.
☑️ Set up blocks.
☑️Organize a how-to.
☑️Regularly audit.