Learning any new software often means you hit some stumbling blocks. Despite being fairly user friendly among design software, Sketchup is no different. To help you get ahead of the curve, I wanted to outline the top 15 mistakes I see beginners make with Sketchup.
- Going overboard with the 3D Warehouse
- Not using a scroll-wheel mouse
- Not modelling along the axes
- Not using groups or components
- Not using shortcut keys
- Not selecting the smart way
- Not moving objects the smart way
- Not saving and organizing scenes
- Not properly navigating the Sketchup model
- Over-modelling
- Not auto-saving
- Keeping shadows and textures on
- Not adjusting field of view
- Getting overwhelmed with tools and extensions
- Not having a workflow in place
Going overboard with the 3D Warehouse
Ok, I get it. When you access the 3D Warehouse for the first time, it’s easy to act like a kid in a candy store. But importantly, remind yourself to not go overboard.
Firstly, not everything in the 3D Warehouse is a perfect fit for your project. For the best communication of your ideas, you may still need to model some things yourself, from scratch.
Secondly, not all models in the 3D Warehouse are created equal. Some are amazing constructions, fully optimized. Others are clunky and messy and will slow your file and your computer way down! So if you overload your model with too many of these models, you risk Sketchup crashing and losing work.
Not using a scroll-wheel mouse
I probably sound like a broken record when it comes to using a scroll-wheel mouse for design software, but again Sketchup is no different. Navigating the model is so much easier when you give yourself the options of a left-click, a right-click, and a clickable scroll wheel.
The good news is that this isn’t anything fancy. An under $10 USB scroll-wheel mouse is all you need to get that advantage!
Not modeling along the axes
Especially for modeling any interiors or architecture, it’s important to model along the axes. This means model along the red and green axes for perpendicular and parallel lines and surfaces horizontally and model along the blue axis for lines and surfaces vertically.
If something is slightly askew in your Sketchup model, you’re suddenly limited in how things get modified. Of course, if there is an angled line or surface, it should be modeled as such. However, if it’s supposed to be a 90-degree angle, don’t think 90.67 degrees is close enough. You’re unintentionally making your life a bit harder.
Not using groups or components
Groups and components are pretty much essential to use in my opinion when it comes to Sketchup. Why?
Well, groups and components are how you can organize your model where it’s not just a bunch of lines and surfaces without order.
You need to keep in mind that surfaces and lines stick together. So if you move a line, its adjacent surfaces will also move or stretch or manipulate based on that move. Now every once and a while, that’s a good thing. But most of the time, that’s not what you need.
Imagine you have a model of a room and you have a model of a chair. Now if the room has been grouped and the chair is a component, it’s super easy to move the chair to be in the right place within the room. If the room isn’t a group and the chair isn’t a component, and you try to move that chair, suddenly you’ll be making weird lines in the floors or holes where the legs are and so on…
Long story short! Save yourself time and energy by using groups and components.
Not using shortcut keys
Shortcut keys are not just for the super advanced users. If you start using shortcut keys from Day 1, you set yourself up for efficiency in a way that most beginners could only dream about.
Using shortcut keys is like training your brain and your hands to have a bit of a muscle memory in using the software. This means with just a bit of practice, you’ll be spending much less time thinking and finding the right tool and much more time thinking about the design challenge at hand.
With shortcut keys, Sketchup can become as intuitive as a pen and paper. This means you get a lot of your brain power back to spend on the design. You know, the fun part.
Sketchup themselves has an excellent resource in their Reference Cards, that you can download here. Click here for the Sketchup Quick Reference Card.
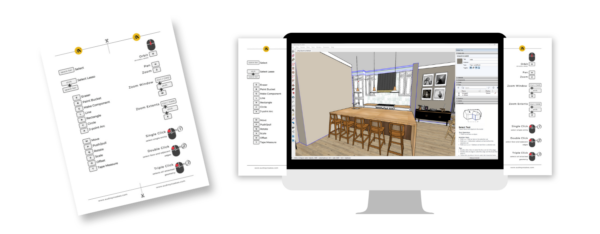
However, I’ve created my own cheatsheet for shortcuts just for beginners. It’s designed to be cut in half and taped on either side of your computer monitor. Yes, it will look a little silly at first, but it gives you all the most important shortcuts right in front of you. You’ll start to pick up these shortcut keys so much faster.
Not selecting the smart way
Selecting objects in Sketchup can be tricky if you don’t know the tricks. So to speak. So what’s the smart way of selecting?
Firstly, know the difference between your clicks:
- A single click will select just the object your mouse is touching. E.g. you’ll select just a square surface.
- A double click will select the object and adjacent objects. E.g. you’ll select a square surface and the 4 lines that enclose the surface.
- A triple click will select all the adjacent objects. E.g. you’ll select all the lines and surfaces of the whole cube that this square is just one part of.
Secondly, know the difference between dragging a selection rectangle to the right versus to the left.
- When you click and drag a selection rectangle to the right, you’ll notice that the rectangle is drawn with a solid line. This means that anything that is fully encompassed by that rectangle will be selected. If the object isn’t fully within that rectangle, it won’t be selected.
- When you click and drag a selection rectangle to the left, you’ll notice that the rectangle is drawn with a dashed line. This means that anything that even touches that rectangle will be selected.
Thirdly, know how to add to your selection or remove from your selection. There a few shortcut keys that can accomplish this, but I prefer to simply use the Shift key. It’s the same for both Windows and Mac.
So if you select a surface, and then want to add a couple of lines to that selection, simply hold down the Shift key and you can add to your selection. Want to remove one of those lines? Hold down the Shift key again, and click that line again and it will be removed from the selection.
Not moving objects the smart way
This can sometimes be a hard-won lesson, but it’s worth learning early. When you need to move a component, I highly recommend not clicking on the object itself to move it, instead click on a nearby surface that helps you move the object with more control.
What does this actually look like?
Say you have a table in a room that needs to be moved. If you activate the move tool, then click on the top of the table and try and move it over, you can unintentionally move it where the table top is suddenly on the floor. This is because Sketchup thinks you’re moving the table top to the floor surface.
Instead, select the table. Then activate the move tool, and click on the floor to move from a point on the floor to another point on the floor. (Bonus points if you move it along an axis and type in a specific dimension to move it!). It’s a small change, but you’re being a lot more intentional and you’ll save yourself quite a few headaches over time.
Not saving and organizing scenes
Now saving scenes is definitely a must when it comes to setting up your model to create 3D views for renderings or visualizations.
However, I also recommend saving scenes just to help you easily navigate the model. Save a scene that gives you a good overview. Save a scene that immediately drops you into a good modeling position for the kitchen. Save a scene that hides the furniture so you can look at the space clear and unobstructed. There are so many scenarios that might mean saving a scene is beneficial. Basically, if it’s a view you need to go back to over and over again, save it as a scene where you can go back to that view with the click of a button.
OPEN FOR ENROLLMENT
Sketchup for interior designers
Learn the ins and outs of one of the most user-friendly software programs available to interior designers. Go beyond the basics and incorporate Sketchup into a professional workflow, from concepts to scaled, annotated drawings.
Not properly navigating the Sketchup model
Speaking of navigating the model, beginners definitely struggle with navigating the model in general. I personally think navigating interiors in Sketchup is more challenging than a lot of other uses of Sketchup. We have to get into the model rather than just looking at it from the outside. So there’s some more specific strategies you need to use to effectively navigate the interior of a Sketchup model. Check this video out for my top tips:
Over-modeling
Are any of you designers perfectionists? Show of hands?
Unfortunately, it’s a battle that a lot of designers are facing, and Sketchup can really provide a challenge for the recovering perfectionist. How does this rear its ugly head?
Over-modeling.
Especially for interiors, you need to be intentional with what needs to be modeled and what doesn’t need to be. Firstly, if something is out of the scope of your project, there’s no need to model it! Yes, it might mean the model looks a little funny, but don’t waste your time. Instead focus on modeling the things that matter and are relevant to the project.
Also model with the most appropriate level of detail. Are you just helping a client with a layout? Maybe don’t spend the time adding the perfect hardware on those kitchen cabinets then.
Not auto-saving
Sketchup is getting better and better, but every once and a while, it will crash. It will crash, and you risk losing work. The good news is that you can save yourself a lot of tears, if you set up auto-saving. This means whether or not you’ve recently saved yourself, Sketchup will automatically be saving your work in the background. So if you do have a crash or freeze, there will be an auto-saved version limiting the amount of work lost.
How do you make sure this is turned on?
Go to the Window menu, then click on Preferences. From there, go to the General section. Then make sure Auto-save is checked and decide how often you want it to auto-save. I believe by default it will save every 5 minutes. This means at most you’ll lose 5 minutes of work. Amazing.
Keeping shadows and textures on
To help prevent Sketchup from crashing, there are couple of other tips to keep in mind. Now of course if you have a super fast and amazing computer, this helps, but that’s not really practical for everyone. So instead, if you think Sketchup is running a bit slow or you find it’s crashing more than you’d like, make sure you turn shadows off!
Shadows especially can really slow a file down. So unless you need them specifically for a rendering or to test light, keep them off the majority of the time.
Sketchup is better at showing textures while keeping the file fast and smooth, but if there’s a lot of textures, it can slow a file down too. If this happening to you, switch to the hidden line or monochrome face style for a little while. Focus on the modeling and only worry about the textures when you’re actively working on that part of the design.
Not adjusting field of view
Have you ever navigated to a room within your model and it feels like you can only see a tiny corner on the opposite side?
This is likely because the field of view needs to be adjusted. Just like real estate listings need a wide-angle lens to show off the whole room sometimes, you need to give yourself a wider angle to see more of the room. This one simple adjustment can make the model show so much more of the space and detail you’ve been working so hard on.
Getting overwhelmed with tools and extensions
This is another mistake that I see a lot of beginners make. Don’t overwhelm yourself with all the tools and the extensions! Now don’t get me wrong, there are some incredible tools right out of the box when it comes to Sketchup, and there are some even more incredible options and tools available via third-party extensions, but quite frankly, you really don’t need them for 99% of your work.
Especially for interior design work, you can effectively model so much of the design with just your basic tool palette and a few downloaded models from the 3D Warehouse. Don’t think you need to know all the ins and outs of the whole software to create an amazing final model.
Not having a workflow in place
Sketchup for interior design projects does not require that you reinvent the wheel every time you open a blank file. Instead, give yourself a workflow or process to follow every time you need to work on a project.
Now this may mean having more than one workflow depending on the needs of the project. For example, if I’m just relying on Sketchup for some quick 3D views of a design (all the drawings are being produced in AutoCAD), that workflow looks different from a design that needs to provide 3D views and drawings. (Yes, Sketchup Pro can do both!).
The key is to use the workflow that helps you maximize the effectiveness of your model while also maximizing the efficiency of your time. Quick 3D views don’t require the same attention to detail as a model that is used to produce dimensioned drawings.
If you know ahead of time the purpose and need for your model, you’ll be able to work within the process that gives you the most bang for your time’s buck.
Final thoughts…
Those are my top 15 mistakes that I see beginners make in Sketchup. I say this as someone who absolutely made them herself when she was just learning. Don’t be someone who just struggles through it, all while developing a hatred for the software. Instead, keep these in mind, and you’ll make bigger leaps in developing your skills with the software and learn to love what it can do for you, your design work, and your career.
Don’t forget to grab your free Sketchup Shortcuts Cheatsheet!


