AutoCAD Layers 101
My students probably get really tired of me saying how important layers are when working in AutoCAD®. Well… they are. So incredibly important.
Layers are so simple yet so powerful.
- Layers will save you time.
- Layers give you the opportunity to have countless versions of drawings all within one file.
- Layers will make your drawings look better.
So let’s look at these a little closer.
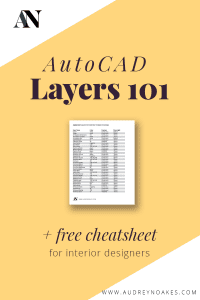
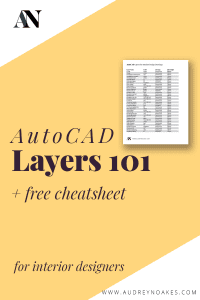
[elementor-template id=”11532″]
AutoCAD Layers will save you time + give you the opportunity to have countless versions of drawings all within one file.
At first, it will definitely seem like using layers is not saving you time, but rather costing you time. It can take a little time to get used to putting your lines and blocks into their relevant layers. But if you do take the time to make sure everything is in a relevant layer, you’ve given yourself an amazing system for working through drawings quickly.
Need a lighting and electrical plan? Turn that layer on and grey out the others.
Need a floor finishes plan that isn’t covered with your furniture layout? Turn those layers off and print!
Organise your drawing into layers, and you’ll have a whole host of options in how you communicate your designs. These options would take hours or be impossible if you didn’t take the time to work with layers.
AutoCAD Layers will make your drawings look better.
Layers will allow you to organise your drawings in suitable line weights. Line weights are such an important part of making your drawings look great. Often, the difference between a novice’s drawing and a professional’s drawing is the line weights. There should always be a discernible variety in line weights, heavy lines, light lines, and everything in between.
[elementor-template id=”11558″]
So what are the key things you need to control with your layers?
Layer Name
The names of your layers can be really important. Consider how they sort in the list. Is it easy to find the layer you want? Do you have a logical system of how you organise your layers?
If you’re working with other disciplines like architects and engineers, they likely will have their own standards in naming layers. But you should make your own. Make sure the interiors scope of the drawing is clearly distinguished.
On/off
As you’re working on the drawing, it may be helpful to turn things on and off as you’re working because sometimes it can be overwhelming to have everything on at one time. For example, as you’re designing a tile pattern having any furniture or details turned off will make sure you’re seeing the surface clearly.
Freeze/thaw
Freezing is really similar to just turning off a layer, but it works a bit differently. When you know you need to turn something off for a significant amount of time, freezing the layer will actually be more suitable. For example, freezing all your lighting and electrical information while you’re working on the furniture layout plans is pretty standard that way you’re drawings aren’t overloaded with information.
The good thing with freezing instead of turning off is that it will actually make AutoCAD run faster on your machine. This is because freezing it means AutoCAD ‘forgets’ about the information in that layer, meaning it’s not trying to keep track of it while you’re working on the drawing.
Lock/unlock
Locking your layers can also be a really handy control. Locking layers such as a column layer or an external wall layer will ensure you don’t accidentally move these crucial structural elements of the space. A simple toggle of locking or unlocking these important layers can save you from making a very expensive design mistake.
Print/no plot
This is a really handy control for items that you don’t want to print. For example, you might have a layer on which you place internal mark-ups of the drawings. Having those on a no-plot layer, will ensure those comments never accidentally make it in the printed copy. Other things like your viewport frames or guidelines can be handily put on no-plot layers too.
Color
Color is probably the control that people associate most with layers. The technical drawings in full technicolor on a black screen is probably what people associate most with AutoCAD. Now color is used in two primary ways in AutoCAD.
If you use a color-dependent plot style (this is common in a lot of practices), those colors have a distinct line weight associated with them. For example, if red means a .35mm thick line in the plot style, any time you make a layer red, those lines will be .35mm thick. This means the color you choose will have an impact on the line weight. (Meaning you can ignore the line weight setting in the layer).
Alternatively, if you’re using a default AutoCAD plot style like “monochrome”, the color won’t have an impact on the line weight, and you’ll have to adjust that via the line weight setting for the layer. The colors you use then will help you simply distinguish elements of the drawings. Now, in the case of this plot style, it will make any layer that’s set to an index color as a printing black. This isn’t helpful if you want to print a grey line or a solid color. If you do want to print in grey or color, with the monochrome plot style, you’ll need to set the layer to a true color instead of an index color. This is just the second tab in the color picker dialog box.
Linetype
Linetype is a helpful control within your layers. This will be how you control those continuous, dashed, dotted, etc. lines.
Lineweight
As mentioned before, if you’re using a color dependent plot style, the plot style and the colors will determine the line weights of the lines. But if you’re using a ‘monochrome’ plot style, you’ll need to control the line weights via the individual layers.
Transparency
This is more a niche control for a layer, but it can be helpful. For example, if you have a hatch specific layer, it might be that you want all of your hatches to appear at 50% transparency where it’s less overwhelming for the overall drawing.
New Viewport Freeze/Viewport Freeze
Now in model space, the new viewport freeze toggle button is going to make that specific layer not show up anytime you make a new viewport. This might help if you make a very specific layer, such as an electrical layer, that will only need to appear in a specific viewport, and you don’t want to have to turn it off in all of your other new viewports.
Now when you’re in paperspace in a viewport, you’ll actually have the option to freeze the layer in the viewport. What this does is turn the layer off on that particular viewport, but when you go back to modelspace, it will still be on. This will ensure you can set up a layout and not have to worry about turning on and off layers when you’re ready to print.
So this is a very broad overview of layers and how they can be used effectively in your drawings. Now, if you’re wanting to develop a template with relevant layers for your interior design drawings, I do have a cheatsheet for you! In it, you’ll see all the layers and settings I recommend if you’re going to use the monochrome plot style in your AutoCAD drawings.
[elementor-template id=”11558″]