Here’s something I see all the time: a designer sits down to learn AutoCAD, immediately stumbles across something like dynamic blocks or xref management or batch plotting, and decides the whole thing is just too complicated.
It’s not too complicated. They’re just looking at the wrong stage.
AutoCAD is a deep piece of software. But the designers who get good at it (really good, where it feels fast and natural and almost automatic) didn’t learn everything at once. They moved through stages. And at each stage, they focused on the right things for where they actually were.
So if you’ve ever felt behind, overwhelmed, or like everyone else just gets it and you don’t, this is for you.
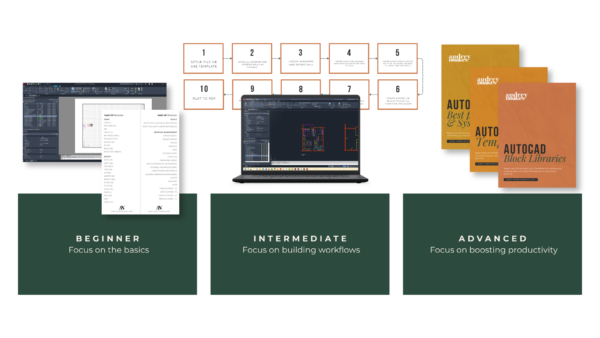
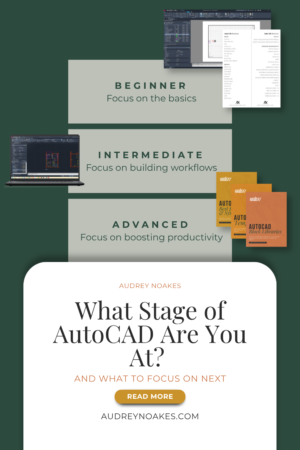
Stage 1: The Basics
You’re here if: The interface still feels unfamiliar. You’re Googling basic commands mid-drawing. You avoid AutoCAD when you can, or you open a file and feel that low-level dread before you’ve even clicked anything.
This is the foundation stage, and the only goal here is confidence.
Not speed. Not efficiency. Not knowing every command in the toolbar. Just: can you open a file and do the thing you need to do without it feeling like a battle?
The good news is that you don’t need to know much to get there. A relatively small set of core commands covers the vast majority of real interior design workflows. Line, polyline, copy, move, trim, offset, layers, layouts, plotting. That’s most of it. The rest builds on top.
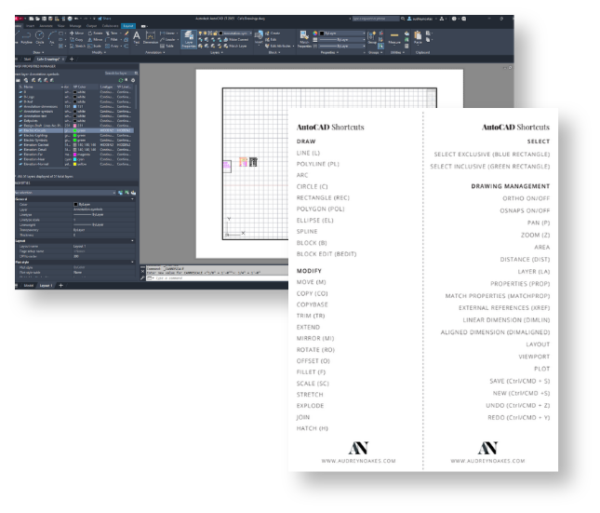
What to focus on: Get the basics solid. The interface, the essential drawing and modifying commands, how layers work, and how to get your drawing onto a page and out as a PDF. That’s it. Don’t let the advanced stuff distract you. It’s not for you yet, and that’s completely fine.
Stage 2: Build Your Workflows
You’re here if: You know the basics, but every project still feels like starting from scratch. You’re slow, which is frustrating, because you know the commands. It’s not that. Something’s just not clicking.
This is the stage where the real productivity gains live.
Because here’s the thing: once the basics are solid, the gap between “can use AutoCAD” and “works well in AutoCAD” isn’t about knowing more commands. It’s about how you use what you already know. It’s about building on those foundations and turning them into real, repeatable workflows for the drawings you actually do.
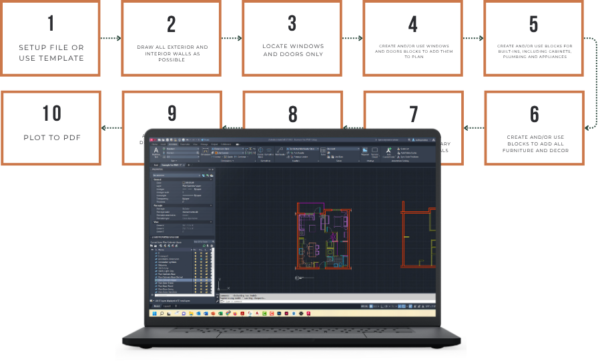
In this stage, you start drawing full floor plans from scratch. You draw sections, elevations, details, plan obliques. You take a project from the first line to the final plotted PDF, and you do it enough times that a rhythm starts to form. You begin to understand how a drawing should be set up before you start, not halfway through when everything’s on one layer and nothing’s to scale.
Ideally, you’ll also start thinking about having a template, even a simple one. Not a complicated, perfectly configured file. Just something to start from so you’re not rebuilding the same setup over and over. The seed of that idea belongs here.
What to focus on: Put the basics into practice on real drawing types. Floor plans, sections, elevations, details. Learn what a good drawing workflow actually looks like from start to finish. Let the repetition build the rhythm.
Stage 3: Boost Your Systems
You’re here if: You’re competent. You’re reasonably fast. But your process still feels rougher than it should, or you dread opening a project someone else set up, or you know that if you handed your files to a colleague tomorrow they’d have questions.
This is the systems stage. And it’s the one that even experienced users often skip.
Here’s what I see a lot: designers who have been using AutoCAD for years, doing perfectly good work, who have never really built out their project environment. No proper template. No block library. Inconsistent layer naming across files. Every project starts from a slightly different place, and small inefficiencies compound across a whole year of work.
This stage is about fixing that.
If you don’t have a proper template yet, now is the time to build one. Not just a file with a title block in it, but a starting file that’s set up the way you actually work: your layers, your text styles, your dimension styles, your plot settings, all ready to go before you draw a single line.
And alongside that, your block library. The furniture, fixtures, and symbols you use on every project, built as proper blocks, organized so you can find them and drop them in without hunting around every time. This is one of those things that feels like a lot of effort upfront and then pays you back on literally every drawing you do afterward.
Then there’s the bigger picture: your file naming, your folder structure, your standards. The stuff that makes your practice feel like a practice rather than a pile of drawings.
What to focus on: Build your template. Build your block library. Audit how you’re working and tighten it up. The goal isn’t perfection, it’s consistency. A consistent system you can rely on is worth far more than an optimized one you only use sometimes.
Wherever You Are Is the Right Place to Start
The thing about these stages is that they’re not a race. There’s no prize for getting to Stage 3 fastest, and there’s no shame in being at Stage 1 right now.
What matters is knowing which stage you’re in, so you can focus on the right things instead of trying to learn everything at once and getting nowhere.
If you’re at Stage 1: get the basics solid. Don’t skip ahead.
If you’re at Stage 2: stop starting from scratch. Start building the habits that turn your basics into real, repeatable work.
If you’re at Stage 3: you already know what to do. You’ve probably known for a while. Go build that template.
One stage at a time. That’s all this is.